10 Hacks To Clean, Repair, and Restore Your Old BBQ Grill

Just about every time I go to the Home Depot in the summer time, I stare longingly at the shiny bbq grills lined up out front like troopers waiting around for orders. They’re so new, and have so many knobs and buttons! They can smoke, grill, or keep baked food warm!
Like most of us, I had an old grill on my back porch. It was a little rusted and had several years of use on the rack, however, it could still turn out a good hamburger. So rather of purchasing for a new grill, I saved funds by repairing and upgrading my old bbq grill back to its glory – and added a couple of bells and whistles along the way.
Do you want to do the same? Follow these 10 easy steps to get the bbq grill of your dreams!
How to Restore Your Old Gas Grill in 10 steps brought to you by BBQservices.ca
Your one-stop shop to have your BBQ professionally cleaned, repaired and restored.
Step 1. Clean It Out
Each and every time you use your grill, it accumulates all kinds of soot, ash, and grease. At bare minimum once a year, you will need to put on some gloves and give it a good deep cleaning (i.e. incorporate it in your home spring cleaning checklist). If you have a shop vac, use it to hoover out all of the particulates that have settled in the bottom of the bbq grill. Next, take out the burners and use the vacuum to clean them out as well. Finally, use a wire brush to scrape off as much gunk as you can from the inside, and vacuum once more.

Step 2. Examine the Burners
You will need to check out and see if the burners are still in good operating order. 1st, light them – the burners should light instantly and burn evenly. If they don’t, you need to most likely change them. Replacement burners can be ordered at a hardware retail store or from the manufacturer. If the burners appear to be serviceable, remove them and give them a good scraping and cleaning.
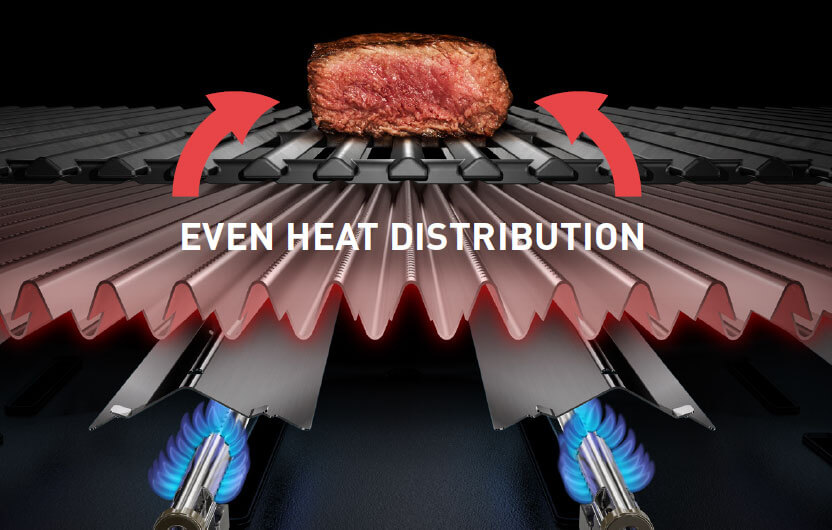
Step 3. Ensure Adequate Heat Distribution
On a gas grill, you need to always have something between the flames and the food to spread the heat. Your grill should consist of a lower rack in between the burners and the higher rack in order to retain ceramic briquettes and lava rocks. Lava rocks look awesome, but briquettes have the benefit of being easy to clean. To clean a ceramic briquette, soak it with vinegar and then scrub with a wire brush. If you are not able to clean them, change them.
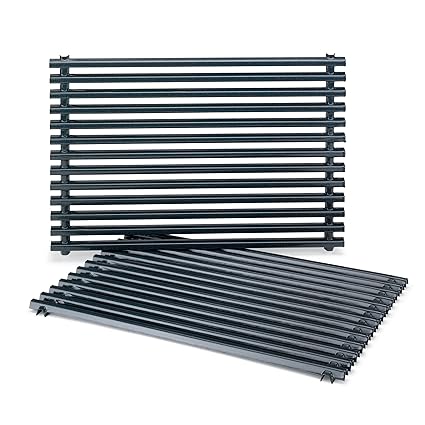
4. Enhance Your Cooking Surface
A great number of low-end grills come with stamped steel grates that are covered with porcelain. They are not great when new, and get even worse as you use them and clean them with a wire brush. It’s easy to improve your grill by buying a new grate. Stainless steel is the best, followed by porcelain coated steel bars. Some folks desire the fantastic grill marks made by iron grates, but keep in mind that you will have to clean them by hand and re-oil them right after each use.
5. Re-Paint the Body
Most cheap grills are made of cast aluminum that is painted black. The paint will fade over time, however, that is no reason to toss away the grill. You can very easily re-paint your grill with special, high-temperature black spray paint. Never ever use any paint that is not clearly indicated for use on an outdoor grill. Whenever painting, focus on the outside of the grill, as the interior will be blackened with soot and will by no means be clean enough to retain a new coating of paint.

6. Add a Drip Guard
One of the challenges I had with my old grill was that the drippings from my meat would puddle up on the lower rack of my grill. I added a drip guard formed like an inverted V and now drippings roll straight off, eliminating flare-ups. Common drip guards are sold at most hardware stores.
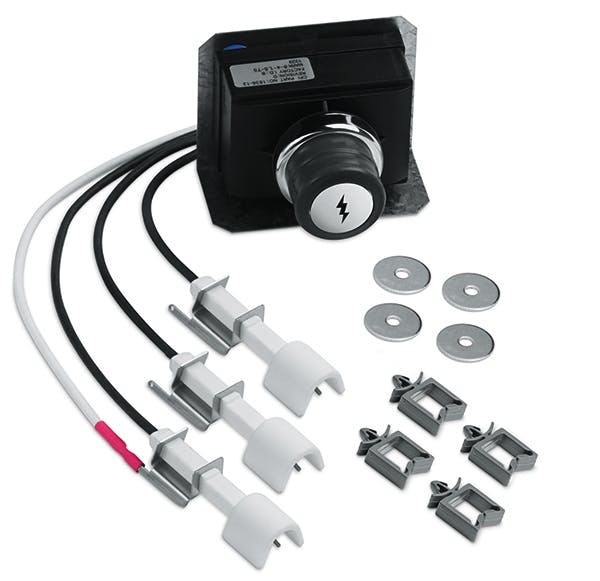
7. Swap the Igniter
The piezoelectric ignition system well known on most grills has a rather limited lifespan. If you find your self throwing matches onto your gas grill, it is most likely time to change the ignition system. Luckily, a new ignition assembly is reasonably priced and can be bought at most hardware shops.
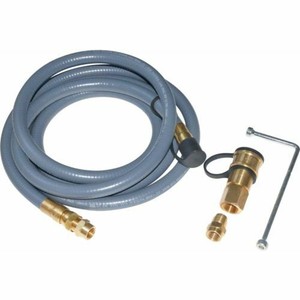
8. Change to Natural Gas
There are a couple of things worse than running out of propane while you are cooking on the grill. If you have a natural gas connection at your house, it may possibly be time to change your grill to use it. First, track down a kit designed by the manufacturer to convert from propane to compressed natural gas (CNG). Several grills will have that choice, but not all. Next, hire a gas fitter to come out and install a gas extension line to your grill. Now you can get pleasure from your barbecue knowing that you will in no way run out of gas.
9. Incorporate a Rotisserie
For less than $50, you can incorporate an electrically-operated barbecue spit to just about any gas grill. Almost nothing is quite as Wonderful at a juicy rotisserie grilled chicken that is slow-cooked and self-basted.

10. Incorporate a BBQ Light
Adding a bbq light.
Final Word
Your old gas grill may appear like it is on its last leg, but it most likely still has some life still left in it. By strategically changing different components, you can restore its function to where it was when it was new – or quite possibly even better.
Do you have any experience upgrading or repairing your gas grill? Share your best tips in the comments below.